Blog

Mid-Summer Garden Maintenance: What to Plant, Prune, and Plan in July

Raised bed vegetable garden in the summer

As much of the US, and other countries are roasting in summer’s heat.  July can also be a time of abundance in your garden.

Summer storms can bring downpours that give plants a flush of water for quick spirts of plant growth.

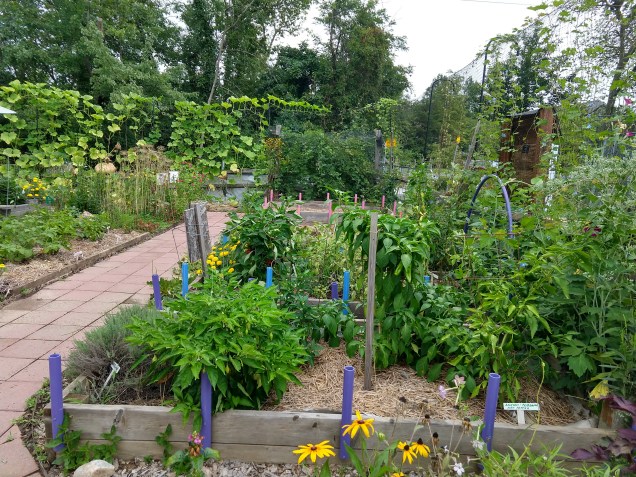
This is why doing a mid-season assessment of what is happening in your garden will clarify how to keep your garden flourishing the rest of the summer.

Take a cool morning, mid-day break or evening to slow down and observe what is happening in your garden. This will allow you to see where to take action.

light green number one is a dark green circle with a lavender outline

Reflect – What’s Thriving and What’s Struggling?

We love those signs your plants are doing well.

The fun part tends to be seeing what plants and crops are thriving and producing. Perhaps you’ll find a huge zucchini hidden under those huge leaves, or start getting so many cherry tomatoes you can gift some to friends.

Then there are those plants that are not doing great.

Look for mid-season stress indicators such as wilting leaves and signs of nutrient deficiencies.

WILTING LEAVES

Heirloom tomato plant with wilted yellowed leaves and large green fruit.

If you see wilting leaves, notice if they only wilt in the heat of the day, but perk up overnight.

Heat stress can wilt leaves either temporarily or permanently. 

Leaves can also wilt from a disease or bug predation. Yellowed leaves are often a disease and some insects can severely damage plants and cause leaves to wilt. 

Wilting can also be a sign of lack of water.  Perhaps you have not had rain and been busy and not watered. Sometimes, this is all you need to do. 

See my post on watering your summer garden to pro tips on how best to handling watering in heat.

Squash vine borer damage.

Squash Vine borers are a good example of this. See my article on dealing with them.

Keeping a garden journal in some form is a great way to start cataloging what is happening in your garden.

Observation and documenting what you see are the first steps to mitigating critters and diseases with an Integrated Pest Management System. You can get my Integrated Pest Management Workshop to creating yours including my worksheets, created specifically for home gardeners.

light green number two is a dark green circle with a lavender outline

Prune, Train, Deadhead, and Thin as Summer Garden Maintenance

Let’s look at some pro tips for pruning tomato plants, squash, and herbs.

Prune

tomato plant pruned to a single stalk

If you live in a humid place, then pruning your tomato plants is essential to keep them from getting diseased. Aeration is the key to preventing tomato diseases.

 I make sure to keep the leaves pruned from the bottom 12 inches of tomato plants. Also prune out excess leaves inside the plant.  Get everything you need to get an abundant tomato harvest with my Grow Great Tomatoes Master Class.

I do try and save plants that have gotten some disease.

First by removing the diseased leaves. Observe if the plant starts to bounce back after you do this. If not, if the plant continues to get more signs of disease then it may be best to take the plant out, clean up around it to be sure to get any potentially diseased leaves, and throw the leaves away. Don’t put them in your compost.

This may sound like a bummer, but it gives you the opportunity to plant something else that may thrive better.

For example, you could seed some basil, which are good companions for tomatoes and will give you some fresh basil later in the season.  Watch your temperatures though as the basil germinates best in temperatures between 75° and 85° degrees. If it is hotter, they may not germinate as well.  

Gloved hands adding straw mulch around lettuce transplants in an annual vegetable garden.

You can always mulch the area well and save it for planting fall crops. See my post on planning your fall and winter garden in summer .

Train

Some crops do better when trellised like cucumbers. Small melons and vining squash can also be trellised.

Dead Head

Deadheading is the task of cutting dead flowers. You can keep flowers pruned and bring them inside to enjoy, or you can let them dry and save the seeds. No matter how you do it, keeping your flower heads trimmed will keep them blooming longer.

Thin

Bush beans can be thinned so they are not too close together.

I like to plant my bush bean seeds 8” to 12” apart.  If some don’t come up, I reseed and end up with a succession of beans in the row.

light green number three is a dark green circle with a lavender outline

Succession Plant Summer Crops & Start Fall Crops

Row of bush bean plants.

You can succession plant several crops in July such as bush beans, potatoes and zucchini.

When bush beans start to stop producing, simply pull the plants and direct seed more.

A few years ago we forgot to plant our potatoes – oops 😯 so we went ahead and experimented with planting them in mid-summer. It was a happy accident as we dig fresh potatoes in December. 🥔❄

As I wrote about in a previous article, mid-summer is the time to start fall crops you want to transplant like broccoli, cabbage, chard and kale. Save direct seeding cool season crops until later in the year though, as they won’t germinate well when it is hot. I have a seed germination chart in that fall garden planning post.

If you do want to sow seeds in hot weather, try and keep seeded areas in the shade of other plants or under shade cloth.  Plant them in the evening and water them well so they have the cooler night temperatures to start.  Keep them well watered, but don’t drown them either.  You soil should be moist, not dry or waterlogged. Don’t use all your seed, test some to see how they do in you mid-summer climate. If they germinate well, then you can plant some more.

By replacing underperforming crops, you will better utilize your garden space.

light green number four is a dark green circle with a lavender outline

Refresh and Rebuild Soil

If you plants don’t have much leaf growth, your soil might be lacking in nitrogen. In this case you can add some coffee grounds. You can also add some compost or worm castings to freshen up your soil.

straw mulch on pepper bed

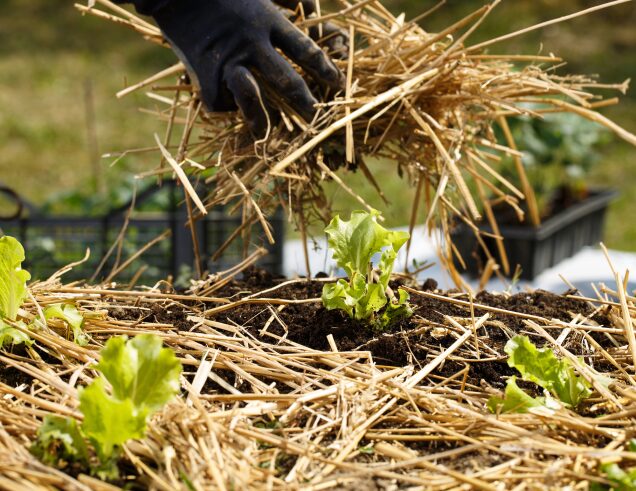
In summer’s heat, it is super important to keep your soil covered not only to control weeds but also to retain moisture in the soil.

Mulch keeps the roots of your plants cooler, which your plants will appreciate. Read my article on mulching your vegetable garden.

light green number five is a dark green circle with a lavender outline

Plan Ahead – Summer Seed Saving

Different varieties of saved bean seeds.

A great thing to do on these hot lazy summer days is saving seeds from early maturing plants that can be planted next year.

Remember, that gardening is a process. We celebrate what’s working and make informed changes for the time at hand, and for next year. 

If something hasn’t done well in your garden, that is ok!  Every year something thrives and something doesn’t in my garden and the gardens of my friends. This is simply part of the process. It is one way we grow and learn.

If you have any July garden wins let me know and if you have questions, let me know that too here.

Summer Garden Maintenance Checklist

This reusable checklist keeps you on track with veggie, herb and flower summer garden maintenance.

The post Mid-Summer Garden Maintenance: What to Plant, Prune, and Plan in July appeared first on Innovating Organic Gardening.

Considerations for Starting Cool Fall Crops in the Summer

Cool season fall and winter vegetable crop harvest

It might be blazing hot outside now, but smart gardeners know—it’s the perfect time to start thinking about cool-season crops.🥦

📆I think of June as being like January.  In January I plan my spring and summer garden and then six months later, I consider my fall and winter garden.

Most people think of tomatoes when they think of growing a vegetable garden, yet summer crops are only part of what your garden can grow for you.

👍Top Reasons to Grow Food in Fall & Winter

  1. Eat from your garden year round
  2. Less bugs and weeds
  3. Lower maintenance

Let’s look at considerations for starting fall crops in the summer.

As I am sure you know, there are two different to start plants, indoors and outdoors. The considerations for each are somewhat different and so is the timing.

No matter what you decide to plant for the fall and winter garden, some planning will allow you to make the most of your garden in each season.

Space for Direct Seeding Fall Crops

watering veggie garden at the soil level

Just as we removed spring plants to make room for our summer ones, we need to remove summer plants so we have space for the fall and winter ones.

Another way to make space for fall planted crops is by saving room when planting summer crops.

straw mulch on pepper bed

One example is to plant summer plants like tomatoes and peppers farther apart so there will be space in between to plant fall lettuce. 🥬

In humid climates, this gives you the added benefit of more air circulation around your summer plants which will help keep diseases at bay.

Summer Weather & Cool Weather Crops

🌱Direct Seeding Cool Crops

While most folks are harvesting tomatoes and zucchini, savvy growers are already sowing the seeds for crisp, cool-weather crops.

Direct seeding may not be possible in areas with hot summers.

There are certain cool loving crops that simply can’t take the heat of summer, and also don’t transplant well, if at all.

Raised garden beds and hoophouses with you green planted

For these crops, like cilantro, dill, chervil, arugula, peas, spinach and baby greens wait to direct seed them until the end of your hot summer weather.

Fall crops like it cool and here are the best temperature growing ranges for some popular fall crops. These crops are happier in even colder temps, but won’t grow well, or will die in warmer temperatures.

Ideal Growing Temperatures for Fall Crops

  • Beets: 50°F – 75°F (10°C – 23°C)
  • Broccoli: 60 – 75°F (16 – 24°C)
  • Cabbage: 55 – 75°F (12 – 23°C)
  • Cauliflower: 60 – 65°F (15 – 18°C)
  • Celery: 55 – 70°F (12 – 21°C)
  • Chard: 50°F – 85°F (10°C – 29°C)
  • Collards: 60 – 70°F (16 – 21°C)
  • Fennel: 60 – 70°F (16 – 21°C)
  • Kale: 55 – 75°F (12 – 23°C)
  • Lettuce: 40 – 75°F (4 – 23°C)
  • Parsnips: 50°F – 75°F (10°C – 23°C)
  • Peas: 45°F – 75°F (7°C – 23°C)
  • Radish: 40°F – 70°F (4°C – 21°C)
  • Spinach: 50°F – 60°F (10°C – 16°C)
  • Turnips: 50°F – 75°F (10°C – 23°C)

So you can see, that starting many transplantable plants indoors can be to your advantage.

We will look at them in a minute, but note there are some crops that you can plant in the summer and grow into the fall like carrots which grow in temperature ranges of 45°F – 85°F (7°C – 29°C).🥕

Starting Fall Crops Indoors & Hardening-Off

<img data-recalc-dims="1" loading="lazy" decoding="async" width="540" height="364" data-attachment-id="492" data-permalink="https://priorunitygarden.blog/2025/01/16/5-simple-steps-to-seed-starting-success/first-babies-under-light-2010-med/" data-orig-file="https://i0.wp.com/priorunitygarden.blog/wp-content/uploads/2013/08/first-babies-under-light-2010-med.jpg?fit=540%2C364&ssl=1" data-orig-size="540,364" data-comments-opened="1" data-image-meta='{"aperture":"2.8","credit":"","camera":"Canon PowerShot S30","caption":"","created_timestamp":"1267014003","copyright":"","focal_length":"7.09375","iso":"0","shutter_speed":"0.01","title":""}' data-image-title="Babies Under Lights" data-image-description="" data-image-caption="

Young seedlings under lights in winter

” data-medium-file=”https://i0.wp.com/priorunitygarden.blog/wp-content/uploads/2013/08/first-babies-under-light-2010-med.jpg?fit=300%2C202&ssl=1″ data-large-file=”https://i0.wp.com/priorunitygarden.blog/wp-content/uploads/2013/08/first-babies-under-light-2010-med.jpg?fit=540%2C364&ssl=1″ src=”https://i0.wp.com/priorunitygarden.blog/wp-content/uploads/2013/08/first-babies-under-light-2010-med.jpg?resize=540%2C364&ssl=1″ alt=”grow food from seed” class=”wp-image-492 size-full”>

🌱To begin, seed staring is best done on a warm heat mat. This heats up the soil. Once they sprout, the heat mat could be too hot for them.

The heat mat could also be too hot if they are under hot lights, or in a sunny window in the hot summer sun.

To grow well, they seedlings do need lots of light and cool temperatures, so growing them in a well air conditioned room under lights is ideal.

Hardening off your seedlings slowly will be critical. as the seedlings are not going to be able to withstand harsh hot conditions.

I start by taking them outside at dark when it is cooler. I gradually take them out earlier and earlier in the evening, in a shady spot. If I know I will be transplanting them when it is still fairly hot, I will gradually get them used to full sun. At some point I leave them out all night and bring them in on hot sunny days.

How to Know When to Start Your Fall Plants

When starting summer plants indoors, calculate the days to germinate (or sprout) plus the days maturity (or harvest) + two weeks.  Adding two weeks is important because the sun is getting lower on the horizon (vs rising in spring), the plants grow slower.

🔢So as an example: If I have a cabbage that is 10-14 days to germinate, and 62 days to maturity. Then I would add a mid-point or average of the days to maturity, in this case 12 days to sprout, plus 62 days to maturity, plus 14 days = 88 days.

So I would start these cabbages 88 days or twelve weeks before I want to be harvesting and eating them.  In this example, if I want to harvest them in November, I would be planting them in August.

Transplanting Fall Crops

For those crops you started indoors, after they are hardened off, you can plant them as soon as you have space. 

You’ll want to give them adequate growing time before it gets cold. For example, I like to plant them at least four weeks before my first frost date.

This means you may have to remove some summer plants before you want to.  If you are trying to get more tomatoes from plants that are mostly spent, harvest all the tomatoes, even the green ones and process them. This gives you have space for your fall crops.

I know this can be hard, but you can make green tomato salsa for the winter – AND – have fresh fall crops. You get both!

It took three years to convince my volunteers at the Display and Learning Garden I manage to take the summer plants out in this way.

The first year, they were aghast the very idea. The second year they groaned. But – by the third year of having all this fresh food from October through the winter and into spring, they got it.  They got it so well, that they started looking for summer plants to take out! 😃

I encourage you to look through your seed packets, check out some end of summer seed sales and make and consider what fall and winter crops to grow and start planning.  

Planning a fall harvest in the middle of summer may seem backwards, but it’s the key to a thriving autumn garden. – Debby

Free Fall & Winter Garden Checklist

Learn more or get it NOW🎯⬇

The post Considerations for Starting Cool Fall Crops in the Summer appeared first on Innovating Organic Gardening.

🌿 5 Simple Steps to Create a Container Herb Garden

Parsley, thyme, basil and other herbs in a container.

Your fresh, fragrant, and flavorful harvest starts here!

Dreaming of a lush little herb garden right outside your kitchen door—or even on your balcony or back porch? 🌿

Whether you’re tight on space or just want to keep your favorite herbs close at hand, container gardening is a simple, rewarding way to grow flavorful, fragrant, and even healing plants right where you live.

You don’t need a big backyard to get started—just a little sun, some good soil, and a clear plan.

In this article, I’ll walk you through 5 simple steps to create a thriving container herb garden, so you can enjoy fresh ingredients, gorgeous blooms, and a deeper connection with your garden—no matter where you grow. 💚 Ready to dig in?

light green number one is a dark green circle with a lavender outline

Step 1: Decide what Herbs to Grow 🌱

Container herb garden with oregano, thymes, rosemary and more.

Start with what you already love and use in the kitchen—think basil, thyme, oregano, tarragon, savory, mint, or chives.  

This is why most people I know want to grow some herbs in containers, so they can have some fresh for whatever dish they want to make.

I have even decided what to cook for dinner based on what herbs are abundant in my container garden.  This is a fun way to get creative with your meal planning.😊

✨ Consider adding medicinal herbs like chamomile or calendula to support your wellness naturally. These also add flowers to your herb garden. 

<img data-recalc-dims="1" loading="lazy" decoding="async" width="636" height="557" data-attachment-id="800" data-permalink="https://priorunitygarden.blog/2016/04/02/5-reasons-container-gardening-is-a-great-way-to-grow-organic-food/featured-image-799/" data-orig-file="https://i0.wp.com/priorunitygarden.blog/wp-content/uploads/2016/04/summer-container-garden-1.jpg?fit=1745%2C1529&ssl=1" data-orig-size="1745,1529" data-comments-opened="1" data-image-meta='{"aperture":"2.8","credit":"","camera":"Canon PowerShot S30","caption":"","created_timestamp":"315532836","copyright":"","focal_length":"7.09375","iso":"0","shutter_speed":"0.00125","title":"","orientation":"1"}' data-image-title="Featured Image — 799" data-image-description="" data-image-caption="

Grow veggies on your deck away from deer

” data-medium-file=”https://i0.wp.com/priorunitygarden.blog/wp-content/uploads/2016/04/summer-container-garden-1.jpg?fit=300%2C263&ssl=1″ data-large-file=”https://i0.wp.com/priorunitygarden.blog/wp-content/uploads/2016/04/summer-container-garden-1.jpg?fit=636%2C557&ssl=1″ src=”https://i0.wp.com/priorunitygarden.blog/wp-content/uploads/2016/04/summer-container-garden-1.jpg?resize=636%2C557&ssl=1″ alt=”container garden on your deck with a mix of herbs, vegetables and flowers” class=”wp-image-800 size-full”>

Want to expand your garden’s purpose? Toss in a few compact veggies like lettuce or peppers can add not only interest, but also give you a bit of extra food from your container garden.

Want some edible color in your herb containers? Brighten things up with pollinator-friendly edible flowers—annuals like nasturtiums or perennials like lavender.  💜

Nasturtiums are colorful and have round leaves which vary the leaf shapes in your containers. Having different leaf colors and shapes is a key to beautiful herb garden design. The flowers come in lots of colors.

Lavender is a lovely perennial what is edible and smells fantastic!

A thoughtful mix will give you beauty, flavor, and function all season long!

light green number two is a dark green circle with a lavender outline

Step 2: Assess your Sun and Shade where Your Herbs Containers will Live ☀🌤

Sunlight is the secret ingredient for many herbs!

Before buying your plants, take a few days to observe your space. Is it sunny all day, shaded in the afternoon, or mostly dappled light?

Sometimes simply shifting the location of a table or chair if you are growing on a deck or patio will make a big difference.

⛱For example, perhaps you want your containers on your deck, but your umbrella shades the area. By considering how to rearrange the items on your deck, you can provide your plants more or less sun so they have what they need to be happy.

🌳Pruning one tree branch can also make a big difference. I had a client once who only needed to prune back one small limb of her tree and to get enough light to flood in to grow more sun loving plants.

light green number three is a dark green circle with a lavender outline

Step 3: Match Your Container Location Sun Levels to Your List of Plants 🌞🪴

Once you know how much light your space gets, match it to the needs of the herbs, veggies, and flowers you want to grow. This is where the magic happens! 🪄

Giving each plant its ideal light conditions means stronger plants, lush growth, and bountiful harvests.

This herb container has a curly parsley, a tri-color sage and a creeping rosemary.

Most culinary herbs love 6 or more hours of sunlight—knowing this helps you choose wisely and set yourself up for success. These include basil, thyme, rosemary and oregano.

<img data-recalc-dims="1" loading="lazy" decoding="async" width="636" height="756" data-attachment-id="2905" data-permalink="https://priorunitygarden.blog/2025/05/04/%f0%9f%8c%bf-5-simple-steps-to-create-a-container-herb-garden/herb-contianer-2/" data-orig-file="https://i0.wp.com/priorunitygarden.blog/wp-content/uploads/2025/04/herb-contianer-2.jpg?fit=1005%2C1195&ssl=1" data-orig-size="1005,1195" data-comments-opened="1" data-image-meta='{"aperture":"3.2","credit":"","camera":"Canon PowerShot S30","caption":"","created_timestamp":"1275395457","copyright":"","focal_length":"8.625","iso":"0","shutter_speed":"0.005","title":"","orientation":"1"}' data-image-title="herb contianer 2" data-image-description="" data-image-caption="

This container has a curly parsley, a tri-color sage and a creeping rosemary.

” data-medium-file=”https://i0.wp.com/priorunitygarden.blog/wp-content/uploads/2025/04/herb-contianer-2.jpg?fit=252%2C300&ssl=1″ data-large-file=”https://i0.wp.com/priorunitygarden.blog/wp-content/uploads/2025/04/herb-contianer-2.jpg?fit=636%2C756&ssl=1″ src=”https://i0.wp.com/priorunitygarden.blog/wp-content/uploads/2025/04/herb-contianer-2.jpg?resize=636%2C756&ssl=1″ alt=”Herb container has a curly parsley, a tri-color sage and a creeping rosemary.” class=”wp-image-2905 size-full” srcset=”https://i0.wp.com/priorunitygarden.blog/wp-content/uploads/2025/04/herb-contianer-2.jpg?resize=861%2C1024&ssl=1 861w, https://i0.wp.com/priorunitygarden.blog/wp-content/uploads/2025/04/herb-contianer-2.jpg?resize=252%2C300&ssl=1 252w, https://i0.wp.com/priorunitygarden.blog/wp-content/uploads/2025/04/herb-contianer-2.jpg?resize=768%2C913&ssl=1 768w, https://i0.wp.com/priorunitygarden.blog/wp-content/uploads/2025/04/herb-contianer-2.jpg?resize=303%2C360&ssl=1 303w, https://i0.wp.com/priorunitygarden.blog/wp-content/uploads/2025/04/herb-contianer-2.jpg?w=1005&ssl=1 1005w” sizes=”auto, (max-width: 636px) 100vw, 636px”>

There are some herbs that will be happier with some shade part of the day, especially cool loving herbs like cilantro and dill.

💪🌿 You’re building a container garden that thrives, not just survives.

light green number four is a dark green circle with a lavender outline

Step 4: Choose the Right Container(s) for Your Plant List 🪴💧

Think of your container like a cozy home for your plants! The larger the root system, the bigger and more productive the plant—so go up a size if you can. 🌼

In this case, bigger can be better. Larger containers also allow you to group plants together which can be attractive.

Short on space or large containers, no worries, you can grow in smaller containers too. A grouping of smaller containers can be pleasing to the eye.

Want to make your life easier? Look for self-watering containers that help maintain consistent moisture. 👉But heads up: they’re a helper, not a substitute for regular watering—especially in hot, dry weather.

A self-watering container will allow you to go away for a long weekend without watering, but not take a two week vacation unless it rains every three or so days while you are gone.

Not sure the best color for your container?  Read my article on container colors here.

light green number five is a dark green circle with a lavender outline

Step 5: Use High-quality Organic Soil & Plant Your Herb Container(s) 🌱💚

Don’t skimp hereyour soil is the foundation of everything! Choose an organic potting mix rich in nutrients, and look for one that includes mycorrhizae—beneficial fungi that boost root health and nutrient absorption.

Organic Materials Review Institute - OMRI Listed Logo

🌍 Want to be sure it’s safe? The OMRI label guarantees it meets the current USDA organic standards. Your herbs will thank you with vibrant growth and next-level flavor.

When deciding how to group your herbs in your containers, think about the variety of leaf colors and shapesmix it up!

Three is a good number of different leaf shapes or colors for a container. This container has a purple basil, a showy cardinal basil and marjoram.

It can also be fun to do different varieties of the same type of herb. I am growing twelve kinds of basil this year as an example. In the past I have grown ten kinds of thyme.

Be mindful of using your containers to their full potential by including perennials that will last all winter. After the annual dies back, you’ll still have the perennial!🌿

Example ideas:

  • Annual Italian basil with perennial thyme and a nasturtium.
  • Rosemary with calendula and marjoram.
  • Sage with purple basil and petunia.
  • Oregano with annual chamomile and Thai basil.
  • Parsley with nasturtium and lemon verbena
Herb container garden with marjoram, nasturtium and lemon verbena and a small statue.

Creating a thriving container herb garden is one of the easiest ways to start growing organically—and the rewards come quickly: fresher meals, fragrant spaces, and the joy of harvesting something you grew with your own hands. 🌱

Whether you’re brand-new to gardening or refining your skills, these simple steps can help you build a garden that’s beautiful, useful, and deeply satisfying.  

👉 Ready to grow your best garden yet? 💌 Sign up for The Harvest Companion, my free email newsletter packed with seasonal tips, organic gardening wisdom, and personal support to help your garden—and your confidence—flourish. 🌿📬 Let’s grow together!

The post 🌿 5 Simple Steps to Create a Container Herb Garden appeared first on Innovating Organic Gardening.

Best Container Colors for Your Container Garden

different colored plastic pots for container gardening

We all have our favorite colors, and likely our favorite colors of containers. 🌈

A question from a client promoted this guide on better and worse colors for your container – from your plant’s point of view.🌿

Why from the plant’s viewpoint you ask? Because you want the most vibrant plants, and as low maintenance a container garden as you can get.

It is easy to choose a color because it is trendy.  Yet, because of the nature of “trendy” as transient, when we are buying or painting a container that we will use for several years, we want to move past the simply trendy, to the sustainable.

Worst Colors for Container Your Container Garden

🪴Black

In most cases, the hands-down worst container color is black followed by red.

Here is why.

Black or dark-colored pots can be a double-edged sword. They absorb and retain heat, which might extend the growing season in cooler climates. However, in hot summer months, this extra heat can:

🔥Cause heat stress, leading to wilting and poor plant growth. The black color will heat up faster as it absorbs heat from the sun.  In the summertime, it will get so hot that it will burn the soil, and plant roots in from the outer edge inward at least an inch. 

🙁 Dry out soil faster, meaning you’ll need to water more frequently.

😢Damage roots if the soil temperature gets too high.

This means you have less growing areas, need to water more often and risk damaging your plants.  

🪴Red

Red acts just like black, absorbing too much heat, so everything that applies to black colored containers, applies to red ones.

🪴Other Dark Colors

In general, dark colors are not the best, for the same reason as black container colors. 

There are cases, in colder climates, or if you are using a container for cold season growing only, where darker colors could be useful because you want the container to absorb more heat from the lower sunlight.

If your container is in the shade without direct sun, that is the other time you could consider a dark color.

Black and red are still not recommended because even in cooler climates, summer sun can be intense, but you could go with a dark green for example.

🌱 Solution: If you’re in love with black pots, place them in partial shade, mulch the soil surface with light colored straw, or group them with lighter-colored containers to balance out the heat effect.

✅Best Pot Colors for Growing in Containers  

🪴White

My go-to container color as it will not absorb the sun’s heat and burn the roots of my plants.

The while color adds a clean look that works with any color house, desk, garage, patio or yard.

🪴Other Light Container Colors

Any other light color container will also protect your soil and plant roots from being overheated.

This is where you can get creative if you would like a container garden that is not all white, or not white at all. You could choose a light grey, green, or even pink or blue. This allows you to have a variety of colors or create a color palate for your container garden.

🪴What if you want a container color you can’t find?

Stacks of white, green, black and terra cotta colored plastic containers  at a garden center

It is possible to paint containers to get the color you want, the only thing you’ll want to check is the type of paint. 

Some paint will crack-off or fade. Be sure and check that your paint type is suited for the material of your containers.

🪴Bright Colors

🐝 How Bright Container Colors Can Attract Pollinators (And Which to Avoid!)

Color isn’t just about temperature—it also plays a role in attracting (or repelling) insects! Pollinators like bees and butterflies are drawn to certain colors, while some shades might keep pests away.

🌼 Best Colors to Attract Pollinators:

  • Yellow, blue, and purple are favorites for bees and butterflies. These shades help create a buzzing, thriving garden. If you have not had enough pollinators, these good be good options.
  • Bright red and orange attract hummingbirds, making them great choices for flowering plants that need bird pollination as long as they are not in full sun.

🚫 Colors That Repel Some Bugs:

  • White and very pale colors can deter some insects, as they’re harder for pollinators to see.
  • Bright blue or purple might repel certain pests like aphids, making them a strategic choice for planters near vulnerable plants.

💡 Tip: If you want a vibrant, pollinator-friendly garden, mix and match your container colors to create an inviting, dynamic space for beneficial insects!

Graphics with different colors of containers, black, terra cotta, dark green, white, tan, gray.

So as you can see, you’ll need to assess your specific situation to determine what is going to be the best

When choosing a container color, think beyond style—consider how it affects soil temperature, plant health, and garden biodiversity. Whether you want to extend your growing season, conserve water, or invite pollinators, your choice of color can make a surprising difference!

May your container garden be bountiful!

Debby, your professional organic garden coach, trainer and public speaker.

The post Best Container Colors for Your Container Garden appeared first on Innovating Organic Gardening.

Why Straw is the Best Mulch for Annual Vegetables

There are several reasons why straw stands out as the best mulch option for annual vegetables.

Organic annual vegetable garden with tomatoes, potatoes, beans, marigolds and nasturtiums with straw mulch

In this post we’ll cover those reasons, how to use it and how to deal with a couple concerns you might have.

Why mulch is essential for vegetable gardens

Keeping soil covered is super important for our veggie gardens. The reason is because if we build great soil, it will grow plants for us.

I often say that I never want to see soil uncovered unless I have just done some seeding.  

Benefits of Using Straw as Mulch for Annual Vegetables

Young tomato plant in straw mulch.

Lets uncover why straw is the best mulch for your annual vegetable garden.

💦Moisture Retention – Mulch helps keep soil moist by reducing evaporation. This not only saves you time from watering as often but also protects your soil from drying out and cracking.

👍Weed Suppression – We want the plants we put in our gardens to thrive, not the weeds.  Mulch blocks sunlight from reaching weed seeds and keeps them at bay so your veggies don’t have to compete.

🌡Temperature Regulation – A good mulch layer Insulates soil. This keeps roots cool in summer and warm when it is colder, such as early spring, fall and winter.

😀Soil Health – One of the cool things about using stray is that it will break down over time, adding organic matter and improving soil structure. If you want to seed an area that has straw on it, you can also simply add it to your compost as part of “the browns.”

Learn more about compost

🌿Prevention of Soil-Borne Diseases – Reduces splash-back from rain or watering, preventing disease spread to plant leaves

💪Ease of Use – Straw is lightweight, easy to spread, and simple to move around plants so it makes gardening a breeze.

💲Inexpensive & Easy to Find – Straw is inexpensive and one bale will tend to last a season.  You can find it at box stores and garden centers, but I have found the best deals at farm stores. They seem to have bigger bales for less money.

How to Use Straw Mulch in Your Vegetable Garden

Gloved hands adding straw mulch around lettuce transplants in an annual vegetable garden.

Choosing the Right Straw – If you can find organic, that is always best.

The reason my dad told me to that “Straw is for gardens, hay is for horses” is that hay has seeds, which is awesome for horse nutrition, but you want to avoid grain sprouts as much as you can.

“Straw is for gardens, hay is for horses” – P. Ward

How Much Straw to Use

Zucchini growing in straw mulch.

I like to have a good 2–4 inch layer around plants, leaving space around stems for airflow, but not so much that weeds can sprout. I will sometimes do a thinner 1 inch layer closer to the plant for this reason.

Straw is also great to support squash and melons so they are less prone to rot when touching the soil.

Maintaining the Mulch – Sometimes you need to add more throughout the season to maintain coverage. When I am shifting from one season to the next – and I grow all year – this is when I tend to check the straw layer to see if I need to add more or move it for seeding.

Common Straw Mulch Concerns & Solutions

Spread of Pests & Diseases

Avoid spreading disease by removing diseased plants and the straw mulch around those plants.

If you have had a pest or disease predation on a plant, remove that plant, and the straw around it. Send both the lant and the straw off-site. Don’t compost it to be sure you are not spreading the disease or the pest eggs.

Want to avoid pests in your garden, start with this checklist

You can add straw mulch to your vegetable garden once your directed seeded plants come up.

Straw Blowing Away – Avoid trying to spread straw when it is windy. If you don’t have a choice, spray it down with a hose as you spread it. Also spray it until it is wet, if you have wind coming up in the forecast,

I mentioned earlier that I don’t mulch when I have seeded, yet, you can mulch around your seedlings once they have come up.

Last Straw Mulch Tip

Lettuces in a container with straw mulch.

It works in containers too!

Straw mulch is an excellent choice for organic vegetable gardeners as it encourages healthier plants, reduces maintenance, and improves soil quality. 

It is a sustainable, affordable, and easy to mulch for your annual veggies.

Remember

“Straw is for gardens, hay is for horses” – P. Ward

May your vegetable plants thrive under your straw mulch, Debby

<img data-recalc-dims="1" loading="lazy" decoding="async" width="636" height="477" data-attachment-id="902" data-permalink="https://priorunitygarden.blog/2019/02/09/dealing-with-squash-vine-borers/deb-with-pumpkin/" data-orig-file="https://i0.wp.com/priorunitygarden.blog/wp-content/uploads/2019/02/deb-with-pumpkin.jpg?fit=4032%2C3024&ssl=1" data-orig-size="4032,3024" data-comments-opened="1" data-image-meta='{"aperture":"2","credit":"","camera":"moto x4","caption":"","created_timestamp":"1541083884","copyright":"","focal_length":"3.99","iso":"50","shutter_speed":"0.0018484288354898","title":"","orientation":"1"}' data-image-title="Debby with two Upper Ground Sweet Potato Squashes she grew" data-image-description="

Debby with two Upper Ground Sweet Potato Squashes she grew

” data-image-caption=”

Debby with two Upper Ground Sweet Potato Squashes she grew

” data-medium-file=”https://i0.wp.com/priorunitygarden.blog/wp-content/uploads/2019/02/deb-with-pumpkin.jpg?fit=300%2C225&ssl=1″ data-large-file=”https://i0.wp.com/priorunitygarden.blog/wp-content/uploads/2019/02/deb-with-pumpkin.jpg?fit=636%2C477&ssl=1″ src=”https://i0.wp.com/priorunitygarden.blog/wp-content/uploads/2019/02/deb-with-pumpkin.jpg?resize=636%2C477&ssl=1″ alt=”Debby with two Upper Ground Sweet Potato Squashes she grew” class=”wp-image-902 size-full”>

Debby Ward is a Professional Organic Garden Speaker, Coach and Trainer

What about mulches for other garden beds?

Take a deep, yet quick dive into the pros, cons and uses for other mulches with Mulch Magic – Learn more.

The post Why Straw is the Best Mulch for Annual Vegetables appeared first on Innovating Organic Gardening.

🍒Top Tips for Growing Cherry Trees – Part 3 🍒

Boy picking cherries from a tree that does not have diseases

This is the third and final post in this series on growing great cherry trees.

If you missed the first and second parts, I have included links to them at the end of this post.

One of the things that can inhibit people from trying to grow cherry trees is their concern about diseases and not being sure how to mitigate them with organic methods. 

Here are some common issues that can show up on your cherry trees and how to handle them.

Cherry Tree Diseases

Bacterial Cancer affecting Cherry Tree Health

Bacterial cancer ooze on cherry tree

The most common disease I see is Bacterial Cancer. Black or gold oozy patches develop on your tree as a result of this disease.  It wilts branches, leaves and fruit and will eventually kill the tree.

This happened to my cherry trees and my neighbors some years ago and can eventually kill your trees. 

If you trees are stressed, they are more vulnerable. Insuring your trees have plenty of micronutrients and nitrogen can help. The rock dust I spoke about in Part 2, can provide the micronutrients, provided you have living soil with lots of critters that has not been doused with chemicals.

Certain varieties are less susceptible.

Avoiding overhead watering can help prevent this disease. Cool wet weather conditions are preferred by this disease.

Pruning in winter to keep the branches open is also preventative.

Apply an organic Copper fungicide, rated for organic use in early fall and again in January. You can cauterize cankers with a torch in early summer. Lime sulfer applied in the fall can help prevent the disease the following spring.

For longer term tree health and prevention, apply biodynamic tree paste or foliar micronutrients, or to help the tree’s immune system.

Newly planted trees are especially vulnerable, so be ready.

Brown Rot on Cherry trees

Are your twigs, blossoms or fruit wilting?  This might be Brown Rot which tends to happen when you have a wet spring.

Cherry tree "mummies" from brown rot disease on cherry tree

The rotted fruit are called “mummies” and you want to be sure and remove all of these and take them off-site. 

As with many diseases, proper air circulation is critical. Proper winter pruning is key to cherry tree health.

Remove all infected parts of the tree.  As with all infected plant parts, do not compost them, but take them off-site. Also, remove and take off-site any leaf litter or mulch under the canopy of infected trees.

Apply organic copper, sulfur, or lime-sulfur fungicide at petal fall, midsummer, and again in fall.

Dealing with Critters Issues when Growing Cherries

Scale on Cherry Trees

Scale looks like little bumps on the branches of your fruit tree. They are really live critters. Try a horticultural oil in the spring.

Lady bugs and parasitic wasps eat scale insects if you have them.  Perennial fennel is a host for ladybugs, so having some as a companion for your cherry trees could be beneficial. Both Coccophagus lycimnia and Aphytis melinus wasps are useful for controlling scale.

Making a spray of a teaspoon each of organic non-toxic detergent and neem oil mixed in a gallon of water and sprayed on the trees may also help.

I have seen some people put Vaseline on the scale, which apparently smothers them. This issue I have with this treatment is that Vaseline is a petroleum product and not organic.  

Deer

I always say the best way to deal with deer is to fence your growing area.  This is especially true if you are growing the smaller sized trees. 

The tops of tall standard size trees will be above deer browse level. Therefore although deer may eat the bottom fruit, they won’t get the top.

I have tried many different deletants, but the physical fence is the most effective. Repellents tend to need to be reapplied on a regular basis and eventually the deer get used to them, so you have to switch to another repellent.

Birds love Cherries Too

Speaking of tree size and critter considerations, I know several people who grow standard sized trees, allow the deer to get the bottom, and the birds the top and they take the fruit from the middle of the tree.

Reflective bird scare tape works to deter them, as does old CDs that when hung work like the tape, reflecting and flashing sunlight in the breeze.

Rodent Deterrent for your Cherry Trees

Rodents like rabbits and voles can munch the bark around the bottom of the tree, especially in winter. 

Most rodents don’t like the smell of daffodils, so I recommend planting a ring of them around each tree, about a foot out from where the full size trunk will be.

I hope this has inspired you to grow some cherry trees in your garden.  If you missed the first two parts of this series, here are the links to read them.

Part one of Top Tips to Grow Cherry Trees includes pollination, and tips for choosing trees by type and size.

In Part two of Top Tips for Growing Cherry Trees, you’ll uncover the best way to choose where to plant your cherry trees and how to plant them.

As always, may your garden be abundant!

Debby  

The post 🍒Top Tips for Growing Cherry Trees – Part 3 🍒 appeared first on Innovating Organic Gardening.

🍒Top Tips for Growing Cherry Trees – Part 2 🍒

In the first part of Top Tips for Growing Cherry Trees, I talked varieties, pollination, fruit tree sizes, and the pros and cons of potted vs bare root trees.

In part 2, we’ll look at site location for your trees, planting your trees.  

Planting Your Cherry Trees

Site Location

Choosing the place you plant your trees is important as you want to give them the best possible start.

You want to make sure you plant them is the best possible location, considering what else you want in your yard.

3 Keys to Fruit Tree Site Location

  • Make sure your tree has full sun, at least 6 hours, preferably 8hours of sun. 
  • Plant in a location at is protected from harsh wind.
  • Don’t plant in a “first pocket”, a low place where the frost lingers. This risks late frosts killing the flower buds.  

How to Plant Cherry Trees

graphic that shows how to plant a cherry tree, includes the hole and amendments for your tree

The saying “dig a $100 hole for a $10 tree” applies here.

The idea is, no matter the price of your tree, you want to be sure to provide it the best initial growing conditions you can – hence a $100 hole.

Dig a hole that is at least two feet wide for a small tree.  As you dig, put the soil on a tarp nearby. 

Once the whole is dug, Support the tree upright in the hole. Fill the hole in layers, start with compost, then a layer of native soil along with some mycorrhizae and rock dust, then more compost, then native soil with mycorrhizae. Keep layering until you have filled the hole. 

graphic that shows how deep to plant your cherry tree

📢 IMPORTANT❗ Do not plant the tree so the graft line is buried.  Make sure you can see where the variety (scion) was grated onto the rootstock.

Very gently tamp the soil.  You don’t want to compact the soil too much that is cannot get air and water in, but just enough to hold the tree upright.

photo choses takes, trunk wrap and watering bag for cherry tree

Wrap tree trunk to protect from critters eating the bark.

Stabilize the with tree point stakes. 

If the tree is not in a fenced area, I recommend adding a minimum 4’ poultry net fence around each tree to further keep deer from munching on your new tree.

In the last post of this series, we’ll talk about handling diseases and critters for your cherry trees and talk maintenance.

The post 🍒Top Tips for Growing Cherry Trees – Part 2 🍒 appeared first on Innovating Organic Gardening.

Gardening with Natives & Veggies – Part 3 – From a Native Gardener’s View

My native gardening friends tend to prefer the “low maintenance” of native perennials for their garden. They love to feed the wildlife and so do I, to a point.

My neighbor three doors down has a managed native meadow for a front yard and it is always fun to walk by and see what is blooming, or what birds are munching on the fall seed heads.  

These are some of the delights of growing natives.

They are not so picky about what soil they have, if you add compost each season or what native they are planted next to.

Yet, the low maintenance native garden approach leaves more time for other endeavors, and this is where the native gardener can grow a few things for them to eat.

One of the challenges a native gardener might have is all the wildlife they attract. This can be viewed as a problem, but it is my experience that an abundant mix in the right places gives everyone bounty.

Adding Vegetables to a Native Garden

So here are my suggestions for native gardeners to add a few veggies for themselves without compromising their native gardens. 

Native gardeners already tend to attract pollinators and other helpful insects to their gardens, which can give them an immediate advantage.

<img data-recalc-dims="1" loading="lazy" decoding="async" width="636" height="557" data-attachment-id="800" data-permalink="https://priorunitygarden.blog/2016/04/02/5-reasons-container-gardening-is-a-great-way-to-grow-organic-food/featured-image-799/" data-orig-file="https://i0.wp.com/priorunitygarden.blog/wp-content/uploads/2016/04/summer-container-garden-1.jpg?fit=1745%2C1529&ssl=1" data-orig-size="1745,1529" data-comments-opened="1" data-image-meta='{"aperture":"2.8","credit":"","camera":"Canon PowerShot S30","caption":"","created_timestamp":"315532836","copyright":"","focal_length":"7.09375","iso":"0","shutter_speed":"0.00125","title":"","orientation":"1"}' data-image-title="Featured Image — 799" data-image-description="" data-image-caption="

Grow veggies on your deck away from deer

” data-medium-file=”https://i0.wp.com/priorunitygarden.blog/wp-content/uploads/2016/04/summer-container-garden-1.jpg?fit=300%2C263&ssl=1″ data-large-file=”https://i0.wp.com/priorunitygarden.blog/wp-content/uploads/2016/04/summer-container-garden-1.jpg?fit=636%2C557&ssl=1″ src=”https://i0.wp.com/priorunitygarden.blog/wp-content/uploads/2016/04/summer-container-garden-1.jpg?resize=636%2C557&ssl=1″ alt=”container garden on your deck” class=”wp-image-800 size-full”>

Containers on the deck.

Adding one, two or a few containers on your deck is the first place I would recommend growing some veggies, or herbs as a native gardeners.

This will not take up your native bed space, and be right out the back door for easy access.

It is also the place least likely to be visited by larger animal critters. 

You can grow anything you like to eat in a container, so choose a couple things you live to eat and start there.  You might want to give your tomatoes a screen to protect from birds, but small animals that would go onto your desk don’t tend to bother cucumbers, melons or squash.

<img data-recalc-dims="1" loading="lazy" decoding="async" width="636" height="477" data-attachment-id="1135" data-permalink="https://priorunitygarden.blog/2025/02/14/gardening-with-natives-veggies-part-3-from-a-native-gardeners-view/upper-ground-sweet-potato-squash/" data-orig-file="https://i0.wp.com/priorunitygarden.blog/wp-content/uploads/2020/01/upper-ground-sweet-potato-squash.jpg?fit=4032%2C3024&ssl=1" data-orig-size="4032,3024" data-comments-opened="1" data-image-meta='{"aperture":"2","credit":"","camera":"moto x4","caption":"","created_timestamp":"1567762734","copyright":"","focal_length":"3.99","iso":"50","shutter_speed":"0.00625","title":"","orientation":"1"}' data-image-title="upper ground sweet potato squash" data-image-description="" data-image-caption="

Let winter squash ramble like these Upper Ground Sweet Potato Squash next to native Asters

” data-medium-file=”https://i0.wp.com/priorunitygarden.blog/wp-content/uploads/2020/01/upper-ground-sweet-potato-squash.jpg?fit=300%2C225&ssl=1″ data-large-file=”https://i0.wp.com/priorunitygarden.blog/wp-content/uploads/2020/01/upper-ground-sweet-potato-squash.jpg?fit=636%2C477&ssl=1″ src=”https://i0.wp.com/priorunitygarden.blog/wp-content/uploads/2020/01/upper-ground-sweet-potato-squash.jpg?resize=636%2C477&ssl=1″ alt=”large winter squash” class=”wp-image-1135 size-full”>

Winter Squash & Pumpkins

Let winter squash and pumpkins meander through your native beds. These crops are super low maintenance too. 

They have a long “days to maturity”, meaning it takes a long time for them to ripen.   You can put in the plants, let them ramble and harvest them in autumn.  Then you’ll have some yummy squash in storage to enjoy all winter.

Add in a small fenced veggie garden close to one of your flowering native beds. Adding in a small veggie garden, with protection from wildlife can bring much joy and healthful food to your table.

It is satisfying to sit at your table, eating some fresh picked veggies and watching all the buzz of life in your native garden beds. If you are new to veggie gardening, and want some tips, get in touch, I’d be happy to help!

    Hope you have enjoyed this three part series on growing natives and veggies.  If you missed a part:

    • Part 1 covered three reasons to grow both natives and veggies.
    • In Part 2 we looked at the topic from the point of view of the veggie gardener, and
    • Here in Part 3, we saw three ideas for native gardeners to add some veggies.

    Happy gardening, and if you have any topics you’d like me to cover, let me know.

    The post Gardening with Natives & Veggies – Part 3 – From a Native Gardener’s View appeared first on Innovating Organic Gardening.

    🍒Top Tips for Growing Cherry Trees – Part 1 🍒

    Growing cherries in your home orchard can be rewarding, yet I find many people don’t try them.

    Sweet or Tart? Choosing Cherries to Grow in Your Garden

    When I talk with most people they want to grow sweet cherries, yet there are some compelling reasons to grow tarts one too.

    In this post I’ll talk about reasons to grow both sweet and tart cherries and talk varieties.

    Let’s start with those luscious sweet cherries.

    3 Reasons to Choose Sweet Cherries for Your Garden

    Who can resist the sweet juiciness of a ripe cherry?  I’ll bet if you are reading this post, you look forward to those yummy little gems of flavor.

    light green number one is a dark green circle with a lavender outline

    The first reason so grow sweet cherries in your garden may be obvious, but it is worth saying, because you ❤ LOVE sweet cherries.

    I do!

    I often ask people what they like to eat, because growing what you like to eat is a great way to choose what to grow. If you do love them and I confess I do, then if you are putting some fruit trees into your home orchard, sweet cherries are one crop to consider.

    light green number two is a dark green circle with a lavender outline

    Cherries can be pricey so if you want to eat allot of them, growing your own will save you money. 

    A new bare root cherry tree may cost you $60 or $65 dollars, but if you consider a bag of fresh cherries tends to cost $7 or more, you can see how fast you’ll get your money’s worth and how much money you can save.

    light green number three is a dark green circle with a lavender outline

    Cherries are one of the “Dirty Dozen”, the group of foods that are grown with the most chemicals in the US according to The Environmental Working Group

    One great way to avoid health issues is by eating and growing organically. Therefore, growing your own cherries can save you money in the long run by helping to keep you out of the doctor’s office.

    What about tart cherries? 

    3 Reasons to Grow Tart Cherries in Your Garden

    light green number one is a dark green circle with a lavender outline

    Are you a fan of cherry pie?  How about cherry jam, tarts, ice cream and dried cherries for salads or cookies?

    Tart cherries are the stars when it comes to extending your cherry harvest. These are they type that are used to make pie filling and jams. 

    Your investment in your tree, keeps you from having to buy cherry products  when fresh cherries are hard to find.

    By canning your own cherry pie filling and jams to use the rest of the year, you extend your harvest and save even more money.

    light green number two is a dark green circle with a lavender outline

    Dried cherries are wonderful in cookies and salads.

    They pair well with walnuts and goat cheese in salads.  Dried tart cherries make great additions to cookies. Think cherry chocolate chip – yummy.

    They are super simple to dry with a dehydrator – which is a great investment to preserve all kinds of harvest from your garden,

    You can make your own trail or snack mix by adding them to nuts and seeds and even chocolate chips.

    light green number three is a dark green circle with a lavender outline

    When growing cherries, most varieties need a pollinator, so if you grow a sweet and a tart cherry that are good pollinators, then you get the best of both worlds.

    Sweet Cherry Varieties

    The two most famous varieties are Bing and Rainier. 

    When I was a kid, the neighbors down the street had a Bing cherry tree and my friend and I got to climb it and pick as many as we wanted. 

    More than once I went home with a tummy ache from eating too many, yet it didn’t stop my love of them.

    Bing was introduced in 1875 and Rainer is a good choice for dry climates. If you are in the wetter climate, consider White Gold instead which resists cracking is wetter weather.

    For red consider Stella which requires only 400 hours below 45F to successfully produce fruit. 

    Lapins has large dark red fruit and is widely adapted across the US.  It needs only 500 chill hours.

    For a black variety, if you are up north, consider the heirloom Black Tartarian.  It was introduced in England in 1794 and requires 700 plus chill hours, making it a good choice for those in colder climates.

    Tart Cherry Varieties

    Montmorency is the most well-known pie cherry. 80% of pie cherries grown in the US and Canada are Montmorency. It does need more the 500 chill hours.

    English Morello cherries are another well-known variety that needs 400 to 500 chilling hours. They have deep red flesh and wine red juice.

    How about a Sweet Tart Cherry?

    A sweet-tart cross is Carmine Jewel give you the best of both worlds.

    Kansas Sweet is believed to be another sweet-tart cross. Sweeter than most tart cherries, but with a nice twang. This only needs 300 plus chill hours. A good choice for more southern growers.

    Cherry Tree Pollination

    Some varieties do need a pollinator and some don’t, this is why there is often confusion.

    Traditionally, cherry varieties have been self-pollinating, yet growing them in proximity to another variety, that blooms at the same time would yield more fruit.

    This is why you will see trees listed as ‘Early, “Mid” and “Late” season.  Start with a variety you know you want to grow (see my last post for ideas).  Then look for a variety that blooms at the same time, be it, early, mid or late.

    Variety listings from a good company will list the bloom time and also tell you if they are self-pollinating or not.  One of my favorite places to buy bare roots trees is Raintree Nursery.  For each variety they have a list of recommended pollinators, making is easier for you to choose.

    Chill Hours & Hardiness for Fruit Trees

    2023 USDA Planting Zone map

    When choosing your cherry tree varieties, you’ll need to consider both the chill hours of the variety and your growing zone.

    Chill hours are not the same as your hardiness zone. Cherries are generally hardy in growing zones 4 though 9.  Do look at the variety descriptions to be sure you are in the hardiness zone and have the chill hours for the variety you are considering growing.

    Cherries are generally considered a cooler climate crop, vs peaches that are a warmer season crop, and citrus which is warmer still.

    That said, there are cherry varieties that need less what is called “chill hours”. 

    In horticulture, chill hours refer to the total number of hours between 32 and 45°F that an area receives on average each winter. These are notes as “CU” (chill units). Chill hours are essential for certain plants to break dormancy and set fruit come spring.

    Chill hours don’t need to be consecutive as they are noted as the cumulative total hours in that temperature range occurring between November and March. Hours below 32°F don’t count. And for every day that reaches over 60°F, one half-hour of chilling hours is subtracted from the total.

    Cherry Tree Sizes

    Choosing the size of your cherry tree is an important factor when deciding what to buy.

    At this time there are four general size categories of cherry trees, with some sub-sizes depending on who you buy from.  

    The four main sizes are Mini-dwarf, Dwarf, Semi-dwarf and Standard.

    Mini-dwarf are 6 – 8’.  These are great for growing in containers, which makes them highly portable if you are planning on moving or have a small space.

    Dwarf are 8-16’ and Semi-Dwarf are 12 – 22’. These two are what I tend to see most home growers buy that have a fenced in yard to keep out the deer. Because they are not that tall, deer can teach the entire tree.

    Standard trees are 15 – 30’. The advantage of larger trees is that part of the tree is above deer browse level. You also, get more fruit, so if you have the space, they can be a great choice.

    You can see there is overlap in size, this is why some companies will further break down the four categories.

    Tree size is determined by its root stock.

    Each variety can be grafted onto different rootstocks.

    When buying bare root online, you can choose what size you want for most varieties. When buying from a local nursery, you have more limitations.

    Which brings us to …

    Potted or bare root cherry trees?

    line of fruit trees in a nursery

    There are pros and cons to getting trees both ways.

    Potted Cherry Trees

    Pros:

    • You can find them locally, so you don’t have to wait for a tree to arrive.

    Cons:

    • They are significantly more expensive than a bare root tree. For example, a 6’ tree in a container locally tends to cost an average of 1/3 or more than a bare root tree.
    • You have less variety choices.
    • You have less choices in tree size.
    • You can choose what nursery to buy from.
    • They acclimate slower in your garden. This is because they are used to being in their little potted environment, and hesitate to go outside their comfort zone.

    Bare Root Cherry Trees

    Pros:

    • They are less expensive.
    • You have lots more variety choices.
    • You have more choices for tree size.
    • You choose what nursery to buy from.
    • They acclimate faster to your garden because they need that wonderful soil you have made for them to they thrive.  They have been taken out of their soil and their roots pruned to ship them to you, so they are super happy to get growing when put in the ground!

    Cons:

    • You need to plant them when you get them.

    In the next post, I’ll talk about the best way to plant your cherry trees, plus pest control for your cherries.

    The post 🍒Top Tips for Growing Cherry Trees – Part 1 🍒 appeared first on Innovating Organic Gardening.

    Gardening with Natives & Veggies – Part 2 – From a Veggie Gardener’s View

    Okay folks, lets look at gardening with natives and veggies from the veggie gardener viewpoint. 

    If you grow primarily vegetables and “savory fruits” such as tomatoes and squash in your garden, adding natives amps up your overall diversity as we saw in Part 1.

    In addition there are several natives that can have direct benefit on your veggie production.  Lets look at a few of my favorites:

    Six Natives Plants to Enhance Your Vegetable Growing

    Blue Wild Indigo, Baptista australis. This beautiful 5’ tall native has beautiful blue-purple flowers in spring and is a member of the legume family of plants.

    Members of this plant family sequester carbon in the soil and the leaves can be cut down to add nitrogen to plants either around them or in your compost pile.

    🐝Native bees love it, therefore attracting more pollinators to your landscape. It is perennial.

    Yarrow, Achillea millefolium. I love growing Yarrow, maybe because it is such a wonderful herb for stopping bleeding, but also because it will bloom all summer if you deadhead it and bring the flowers in for bouquets.

    The native common yarrow has creamy white flowers, cultivars have many other colors.

    Yarrow contains fairly high amount of calcium, which helps with the metabolic processes of plants taking up other nutrients. It also help strengthen plant cell walls. High humidity, like we have here in Virginia, along with a cold winter can cause calcium deficiency, so plant yarrow, put the leave around your plants or in your compost to add calcium for your plants.

    Yarrow is perennial.

    <img data-recalc-dims="1" loading="lazy" decoding="async" width="636" height="477" data-attachment-id="1126" data-permalink="https://priorunitygarden.blog/2025/02/07/gardening-with-natives-veggies-part-2-from-a-veggie-gardeners-view/img_0760/" data-orig-file="https://i0.wp.com/priorunitygarden.blog/wp-content/uploads/2020/01/img_0760.jpg?fit=2048%2C1536&ssl=1" data-orig-size="2048,1536" data-comments-opened="1" data-image-meta='{"aperture":"4.9","credit":"","camera":"Canon PowerShot S30","caption":"","created_timestamp":"1437692781","copyright":"","focal_length":"21.3125","iso":"0","shutter_speed":"0.00625","title":"","orientation":"1"}' data-image-title="IMG_0760" data-image-description="" data-image-caption="

    Yellow Swallowtail butterlfy on Joe Pye Flower

    ” data-medium-file=”https://i0.wp.com/priorunitygarden.blog/wp-content/uploads/2020/01/img_0760.jpg?fit=300%2C225&ssl=1″ data-large-file=”https://i0.wp.com/priorunitygarden.blog/wp-content/uploads/2020/01/img_0760.jpg?fit=636%2C477&ssl=1″ src=”https://i0.wp.com/priorunitygarden.blog/wp-content/uploads/2020/01/img_0760.jpg?resize=636%2C477&ssl=1″ alt=”Yellow Swallowtail butterlfy on Joe Pye Flower” class=”wp-image-1126 size-full”>

    Joe Pye Weed, Eutrochium fistulosum: This beautiful tall, mid-summer flowering native is a pollinator magnet, and frankly, just darn beautiful.

    Its big puffy mauve flowers look wonderful at the back of a native flower garden bed, attracting so may different types of native bees and butterflies, you’ll want to stop veggie gardening and just watch the show. Joe Pye is perennial and one of my favorites.

    You can find cultivars that are shorter in height, as the native variety grows 7 feet tall.

    Goldenrod, Solidago spp. Push the window on attracting pollinators into the fall by adding goldenrods to your landscape.

    This is really helpful if you love to grow fall peas like I do.

    Goldenrods are also one of the best late season food sources for pollinators, so an outstanding addition.

    As a note, some people think they are allergic to goldenrod, but they are most often allergic to ragweed.

    This is a fall perennial beauty. There are many types so you can choose which one suits your garden best. Showy goldenrod is a popular choice, as it’s name indicates – it is showy.😀

    Asters, Symphyotrichum spp. Like Goldenrod, asters bloom later in the year, in autumn, thus they give you the benefits listed above for goldenrod. , and give you more color in your garden as the weather turns cool.

    They give you more color in your garden as the weather turns cool. They also can make a nice cut flower for the vase.  Native Aster flowers can be white, purple or pink.

    Examples of native asters are, Smooth aster and Sky blue aster.

    Northern Maidenhair Fern, Adiantum pedatum. Got a shady area?

    Consider adding some of these ferns as they are a great toad habitat. 

    Toads eat bugs, so can help keep your bug population in balance and away from your veggies.

    Add Natives to Your Garden

    So veggie gardeners, you can put in a flower bed of Blue Wild Indigo, Joe Pye, Yarrow, Goldenrod and Asters and have a beautiful garden area that blooms in spring, summer and fall.  Add some ferns to your moist shady spots and you’ve helped that native bee and toad population and your garden!

    In Part 2 of this blog series, we looked at six native plants you can add to your landscape to benefit your veggie garden. There are many more, so I encourage you to add these and get in touch if you want more inspiration and ideas.

    Get notified of new posts to transform your garden’s abundance.

    The post Gardening with Natives & Veggies – Part 2 – From a Veggie Gardener’s View appeared first on Innovating Organic Gardening.